
These are the instructions for chaining together segments to create a machine embroidery lace border using the Free Standing Lace Border set from the Lace Machine Embroidery by Threadlove Floral Lace Border Collection.
As seen in STITCHES magazine!
The original artwork created by Olga Scheaffer.
The Avid Embroiderer wrote a fantastic blog article about using this collection.
The Avid Embroiderer
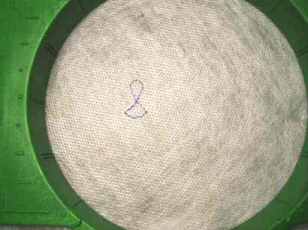
Sew out on vilene, badgemaster or other heavy water soluble stabilizer. These examples were made using Vilene.
This set is created so you chain together the lace portions to create a border of any length. Each design section shows 2 colors. The first color stop is to stop the machine to align the previous segment for a continuous lace border as explained below. It is best to use the same color for the whole design.
The designs ending in - a - are used to continue chaining. Designs ending in - b - are to complete the chain of lace.
| 1. Sew out the first segment of lace. (It must be a design ending in - a -) When the machine stops after the first color just start it again this first time. | 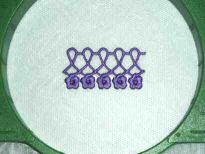 |
| 2. When the design is complete un hoop and cut out the lace leaving 1/2 inch - 1 inch of stabilizer all around. | 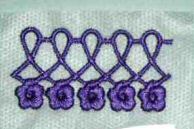 |
3. Hoop the stabilizer and start the machine with your next segment of lace. The machine will stop after it has sewn the first color. This is for alignment. |
 |
| 4. Place the previously sewn segment so that the arm of the design just crosses the loop that has just sewn, and the right corner of the previous segment meets the left corner of the just sewn alignment line. Pin in place. | 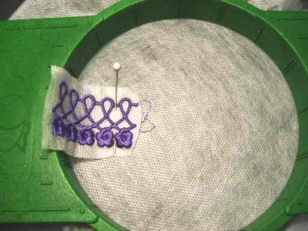 |
| 5. Start the machine to complete the segment. | 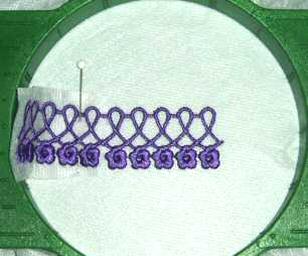 |
| 6. You may repeat this process to create a border of any length. When sewing is completed thoroughly rinse out the stabilizer to create a soft lace. It is safe to put in the washer and dryer. | 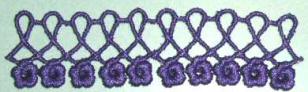 |
Buy The Floral Lace Border Collection!
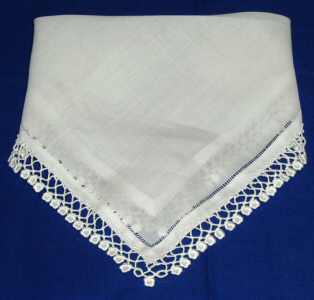
The free standing lace border for this hankie was created as one piece and sewn on the hankie after all the embroidery was complete. It helps to keep the stabilizer in place until after it is sewn on, then wash.
The Avid Embroiderer wrote a fantastic blog article about using this collection.
The Avid Embroiderer